Getting to know a noook® building disc.
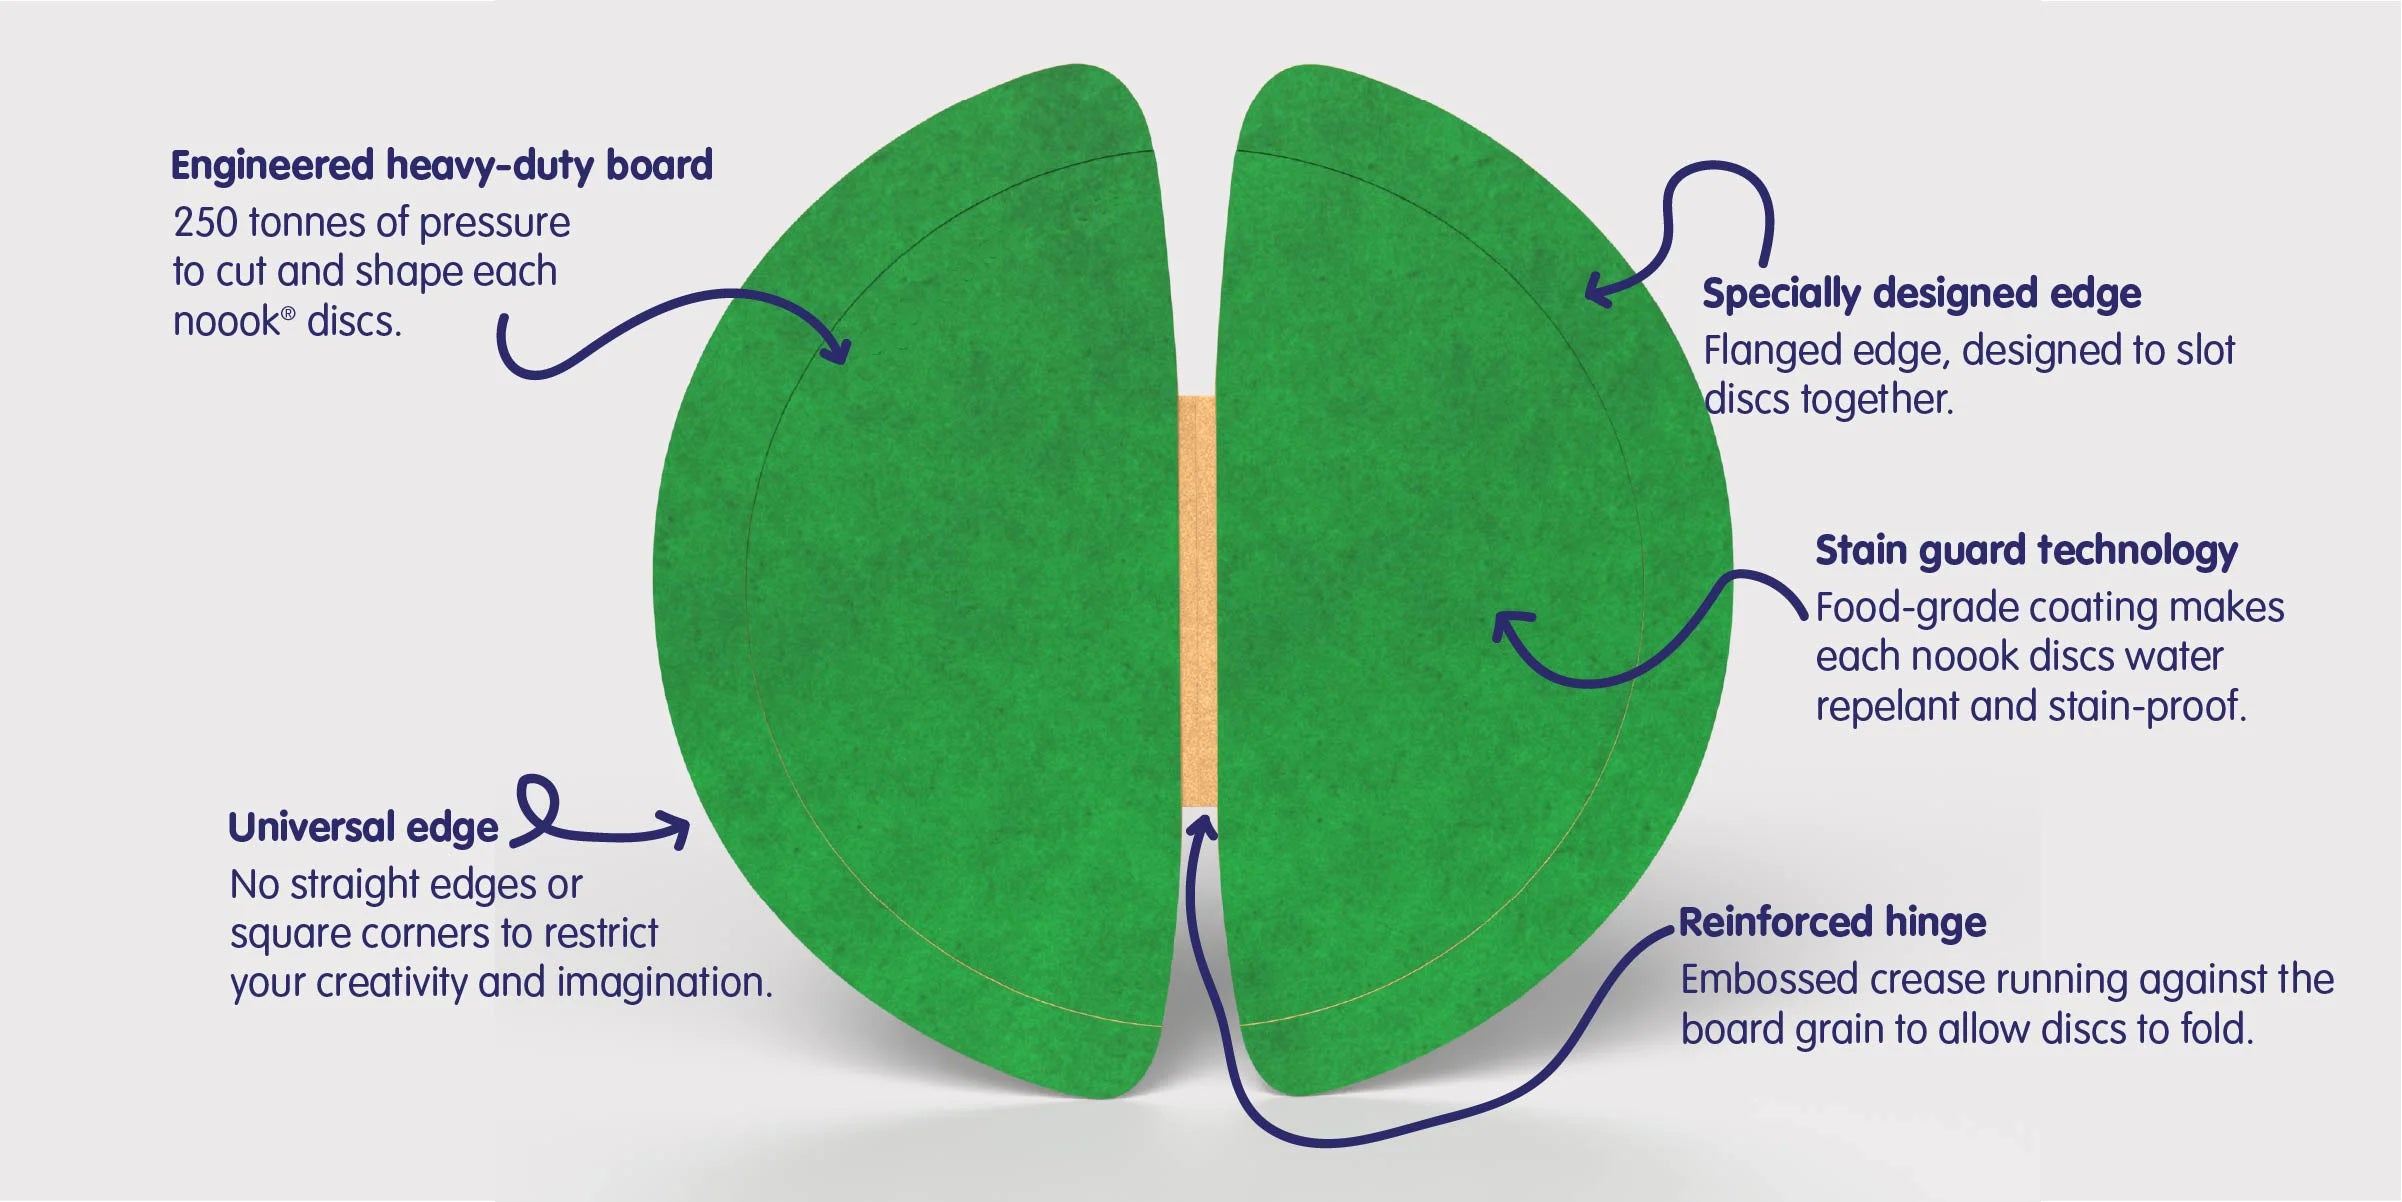
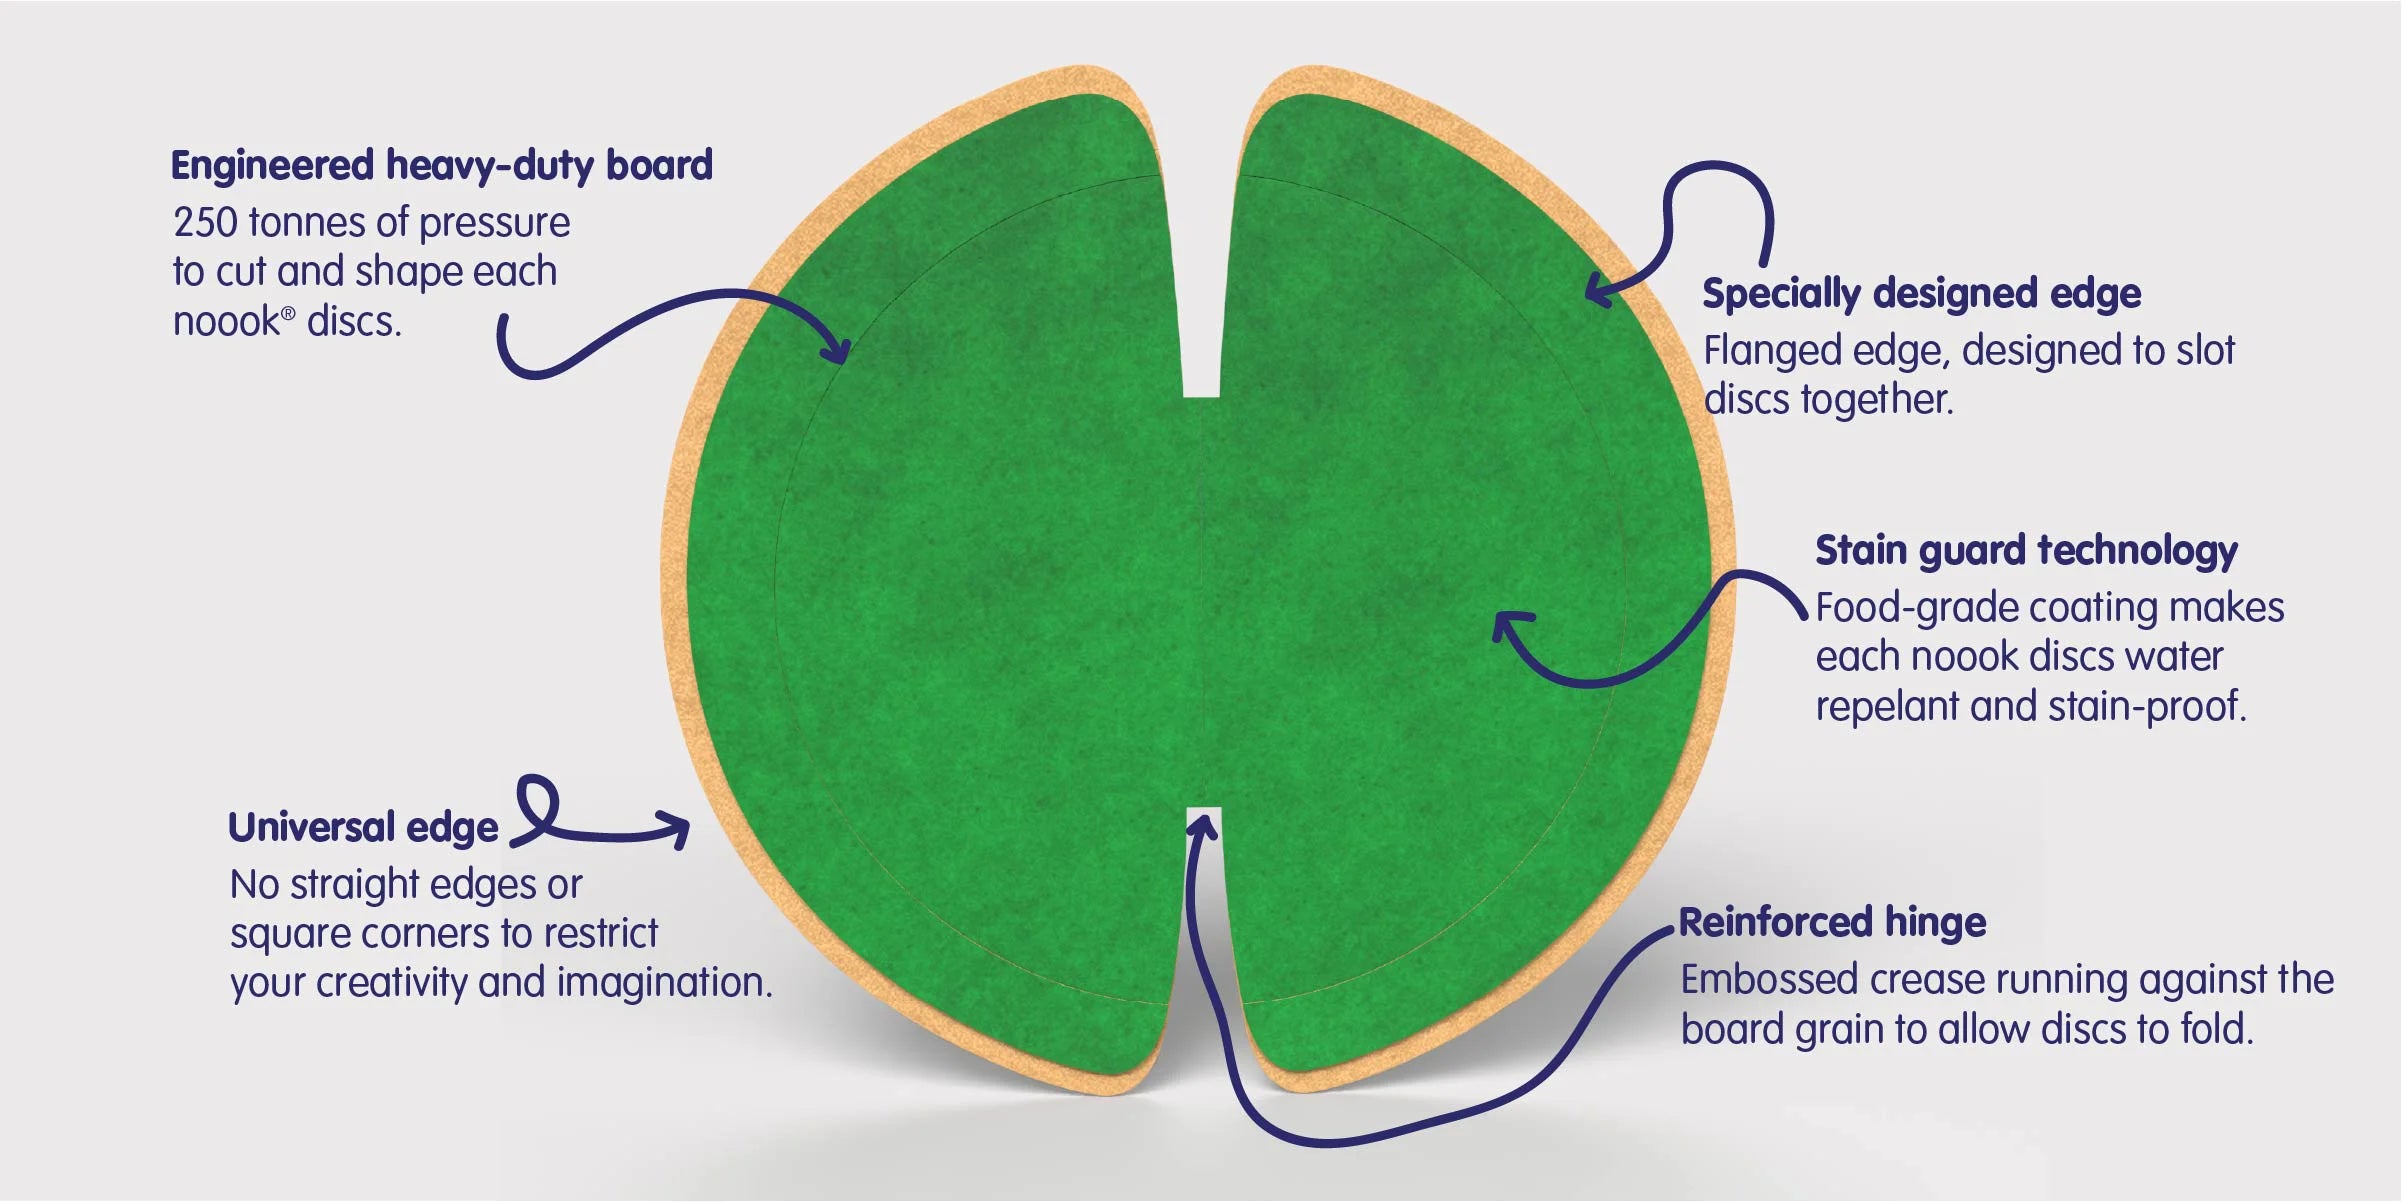
Each noook® building discs is identical. The each have a 'front' and 'back' face; they each have a central hinge' they each have a specially-designed edge to allow them to slot together.
Let's get to know the noook® building discs first.

Front

Back
Before you start building with noook play®, let's cover the basics.
The noook play® basics.
noook play® is simple:
- Start by slotting discs together—not by the cut outs at the end of each fold—but by the gaps that run around the edge.
- Use the hinge that runs across the centre of each noook® disc to make 3D shapes: corners, ridges and more.
- To make a strong flat surface, slot discs together so that the central folds don't align with each other.
After these three basic steps, you can build your dreams. Scroll down to learn more.


Getting to know your noook play® building disc.
noook® discs are all you need.
There are just two things to know about noook play® building discs:
- You connect them by slotting one disc into the edge of another disc. You can do this right around the entire rim of any disc. Think about it like you're weaving the discs together.
- The crease in the centre is to allow you to fold the disc to help you make 3D shapes. We call this part the 'hinge'. Simply bend or fold the disc along this crease. Don't worry if it goes floppy - the hinge won't tear and you can learn more below about how to make discs stiff again.

Getting to know your noook play® building disc.
Slotting discs together.
Open a pack of noook play® and start by slotting two noook® discs together.

Getting to know your noook play® building disc.
Using the hinge.
Fold a noook® disc along the crease in the centre to make a hinge. This changes its shape. Do this to make corners, edges, or anything that helps make your building 3D!

Getting to know your noook play® building disc.
Making corners.
You've just used the hinge to change the noook® discs's shape. If you connect that disc to a row of other discs, you've just made a corner!

Getting to know your noook play® building disc.
Locking noook® discs together.
To make a strong, flat, surface, so
that all the noook® discs stay stiff even if they have previously been hinged,
join them together making sure that the hinges don't line up together.

Stage One
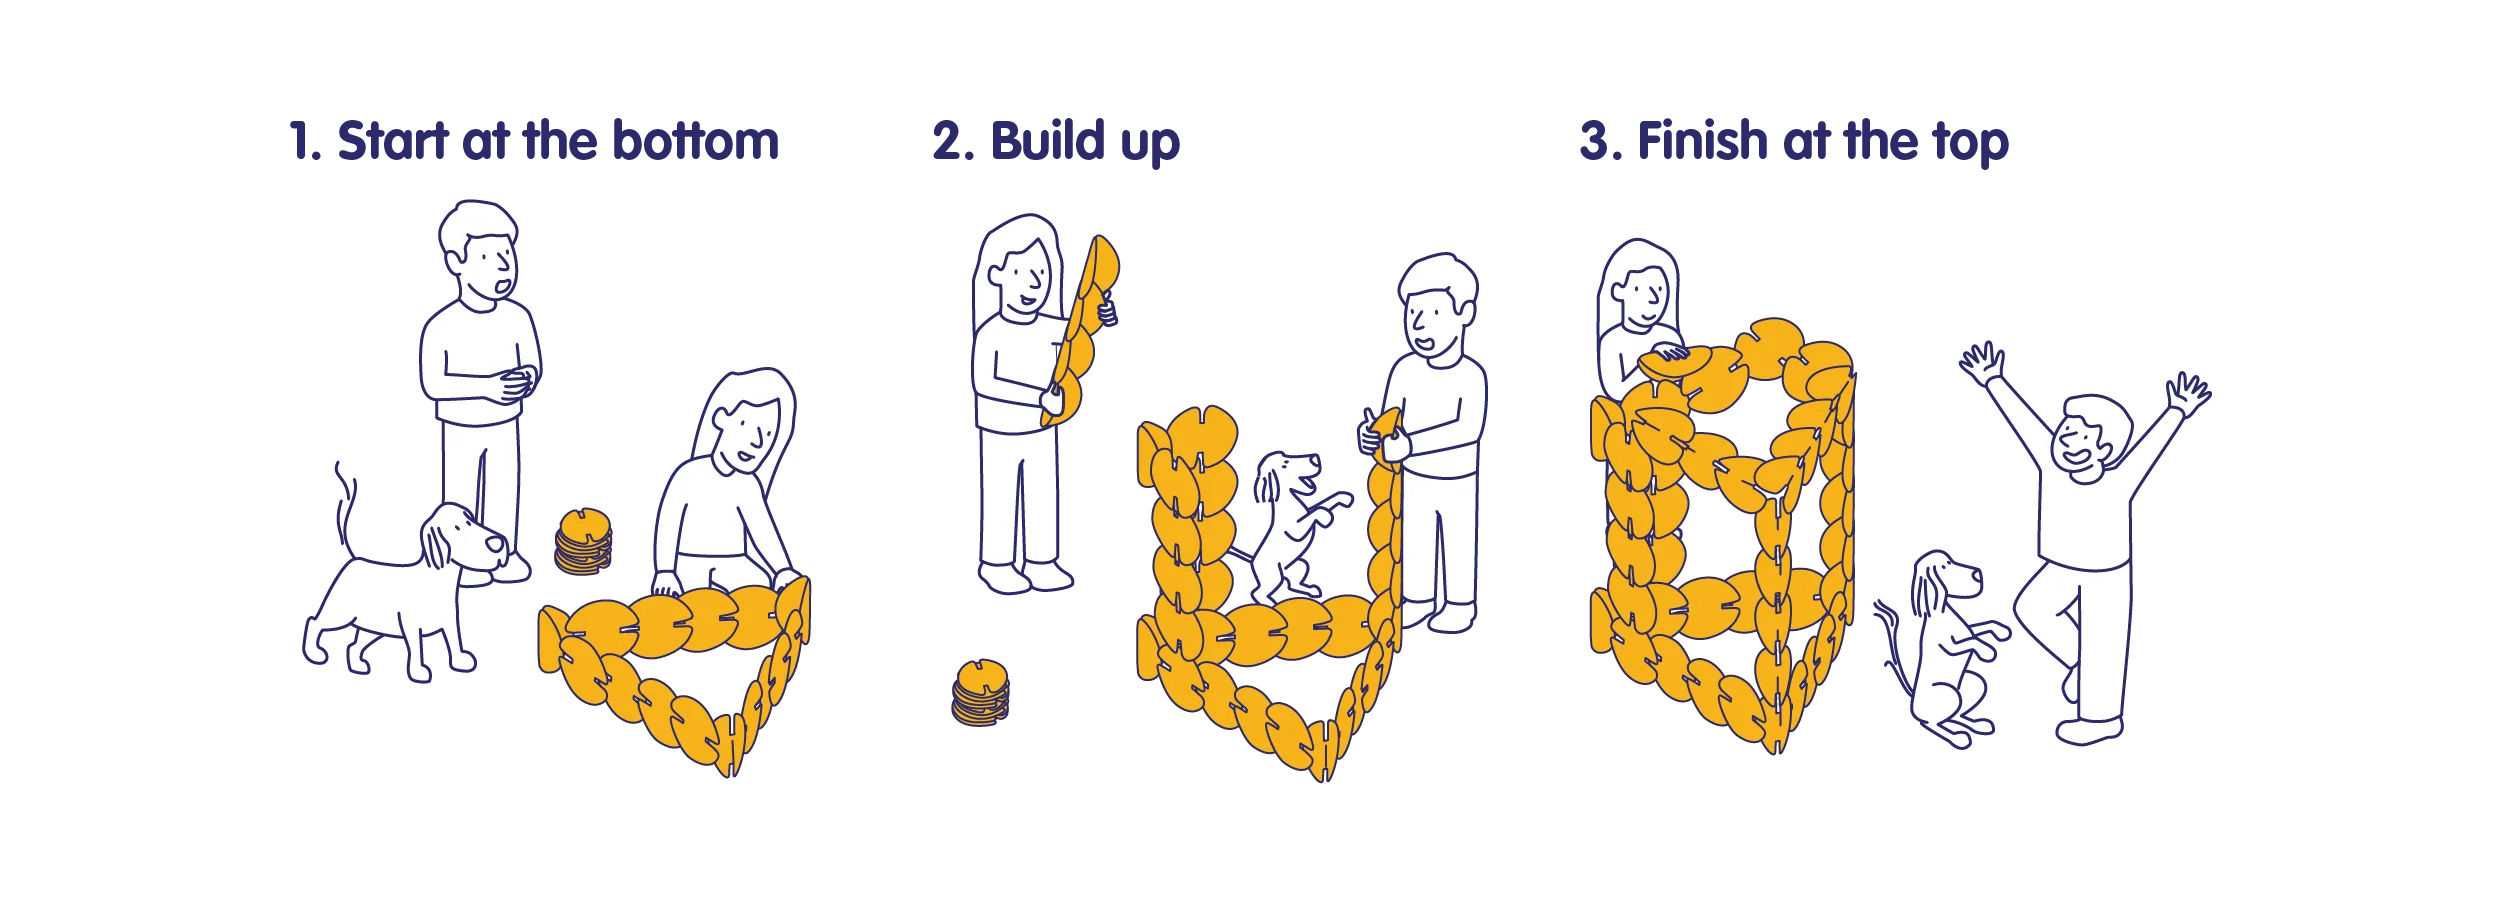
Start at the bottom.
Strong foundation is the key to success - and building dreams. Don't skip this step. Try to use corners, and making triangle & square shapes as much as possible.


Stage One | Start at the bottom.
noook® discs on their own won't stand up.
Straight rows of noook® discs will fall over - that's because there's nothing to support them.
To get discs to stand on their edge, you need to make a corner - something with an angle that changes the direction of the base wall.

Stage One | Start at the bottom.
Angles help noook® discs to stand up.
By using angles and corners in your base walls, your noook® discs will then balance on their edges.

Stage One | Start at the bottom.
Neat rows of noook® discs help make a strong wall.
If your noook® disc are arranged out of line with each other, or with their hinges bending, the wall will be wobbly.
Try placing your noook® discs neat and straight with each other.

Stage One | Start at the bottom.
Straight walls are strong walls.
Practise making walls out of neat rows of noook® discs. You'll quickly find this makes for stronger base walls - and it's easy to do!

Stage One | Start at the bottom.
Build strong foundations with triangles and squares.
A strong foundation is the key to success - and building dreams. Don't skip this step. Foundations made from shapes that join up all the way around—such as triangles and squares—work really well.
How many triangles can you fit into your building?


Stage two
Build up.
Make pillars with noook® discs and you'll be building big dreams in no time!


Stage Two | Build Up.
Pay attention to the direction of the hinge.
When the base is complete, you can now start building. Take care to make sure your noook® discs don't flop at the hinges – so build upwards with the hinge of each noook® disc vertical.

Stage Two | Build Up.
Flat pillars are likely to wobble.
The higher you build a pillar of flat noook® discs, the wobblier it will be. So if you want a pillar higher than, say, three noook® discs, you’ll need someone to help hold it until you can make it stable…

Stage Two | Build Up.
Weave pillars in at the corners.
… as can be done by connecting two nearby pillars with noook® discs making a corner. This makes a much stronger pillar that will support bigger buildings!

Stage Two | Build Up.
A pillar made of corners is stronger.
Use that technique to make an entire pillar - place the pillar on the corner of your building and bend all the nook® discs at their hinges.
This type of pillar won't wobble anywhere!


Stage three
Finish at the top.
Connect your corner towers together with beams to tie it all together!
Now you can bring your dreams to life and play!


Stage Three | Finish at the top.
You now need to tie your pillars together.
Pillars are great - they mean you can build tall. But they need something to hold them more firmly.
This is where arches and beams come in...

Stage Three | Finish at the top.
Connect your pillars together with an arch.
You can connect your pillars together - just like on your base wall. If you arrange your noook® discs into an arch—go up and then down—your building will be even stronger.
That's why big buildings have arches over doorways - arches are very strong!

Stage Three | Finish at the top.
Connect onto your pillars from two directions.
Folding your noook® discs along their hinge and connecting them onto the pillar, and onto a beam coming off the same pillar, means they're tied together tightly. This helps hold everything up.

Stage Three | Finish at the top.
Build together
Ask a friend, your mum or your dad to help you. You'll find it easier if someone holds part of your building up so that you can connect other bits - pillars, arches, beams.
As your building gets bigger, teamwork makes it much easier!

Need help?


